Changing the cursor colour can be a nice tweak to make it stand out better or to customise it to your company colours etc. Maybe you just want a bright yellow cursor because it’s your favourite colour! Whatever your reason is for changing it, if you have Windows 10 with the May 2019 Update or newer you’re at the right place to find out how.
Accessing and Changing the Cursor Settings
Open the Windows Settings App (Click on the Start Button followed by the settings icon (shaped as a gear), or press + I on your keyboard) and navigate to Ease of Access, then Cursor & pointer in the Ease of Access side-bar. You can also search for “Cursor & pointer” in the start menu or settings app to get here.
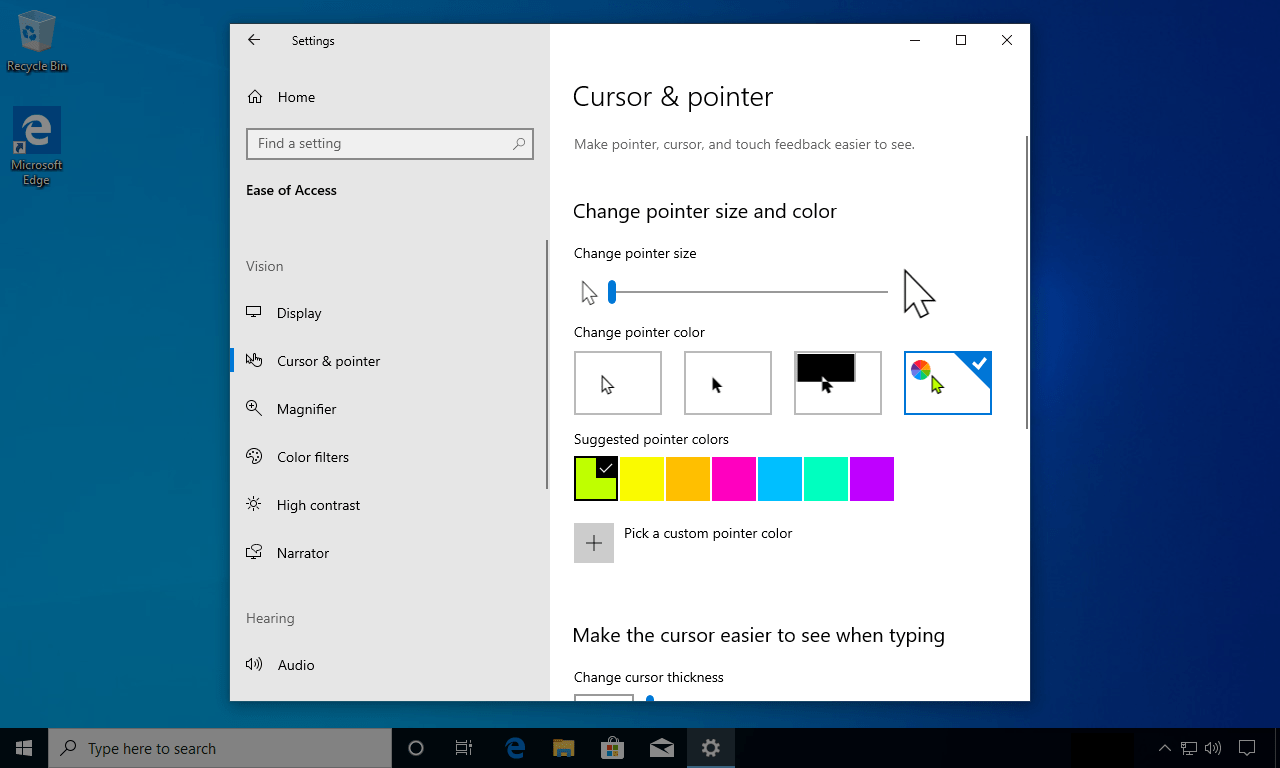
From here, select the pointer colour button which shows the colour wheel and green cursor. You can then customise the cursor colour to the one you would like.
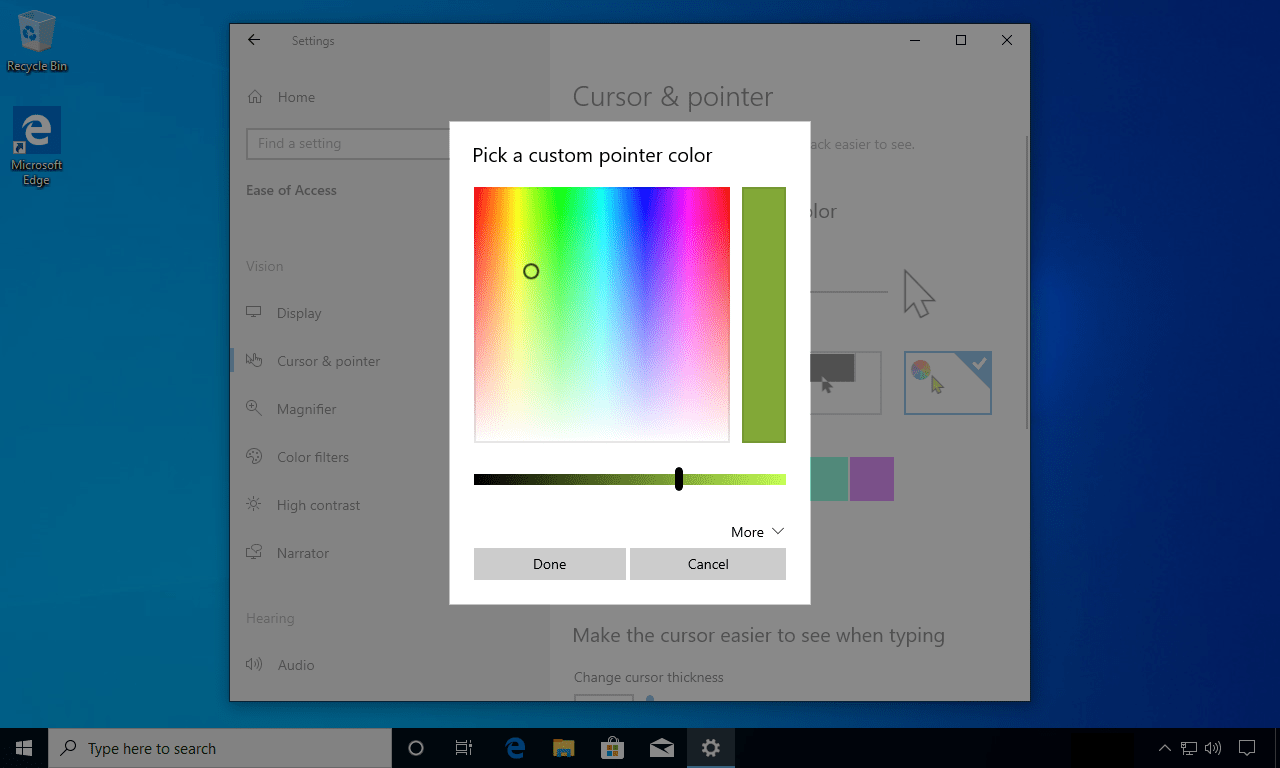
If you don’t like the default palette of colours to choose from, select Pick a custom pointer color, this will open up the colour picker for you to choose a completely custom colour:
Other Cursor Settings
You’ll notice that the cursor settings are in the Ease of Access page. This is no accident, as changing the colour of the cursor can help make it stand out better for some people. From the cursor settings page you can also change the size of the cursor which useful if you’re giving presentations where other people have to follow the cursor on the screen, or if you have a visual impairment that makes it difficult to spot the cursor at its default size.
I hope you’ve found this tip helpful! Feel free to get in touch if you have any questions of comments.