Imagine these situations: The drive that holds your data instantly stops working entirely with no warning, or you accidentally overwrite or delete an important file. A scary situation, isn’t it? Not if you use File History to keep a backup of your files.
File History is a backup feature built into Windows 10 that watches the data in your user profile or other folders you specify for changes and backs them up once something changes. It also keeps backups of older versions of your files and folders so you can go back in time and retrieve older copies of them.
Note: File History doesn’t back up your entire PC. Your programs, operating system etc aren’t backed up by this system. If they become damaged you will need to reinstall them again and restore your File History data into the new installation, or I can take care of this for you of course! The key premise of File History is that your important and irreplaceable files such as documents and pictures can be backed up efficiently and conveniently.
The easiest way to use File History is to use an external hard drive. Network locations can also be used for example if you have a NAS, but I’ll only be covering external hard drives in this guide. I suggest getting an external hard drive with double the capacity of the amount of data you’ll be backing up. If you’re unsure, 1TB is plenty for most people.
Ok, so you’ve got your external hard drive plugged into your Windows 10 PC, let’s dive into it!
Accessing the File History settings
To access File History is very easy, there are several easy methods you can choose from, here are the most common ones. You only need to do one of these:
- Click on the Windows button () and type “File History”, which can bring you to directly to the File History section in Windows Settings
- Search for “File History” from win the Windows Settings app
- Open the Windows Settings app and navigate to Update and Security → Backup
Adding your external hard drive as a File History drive
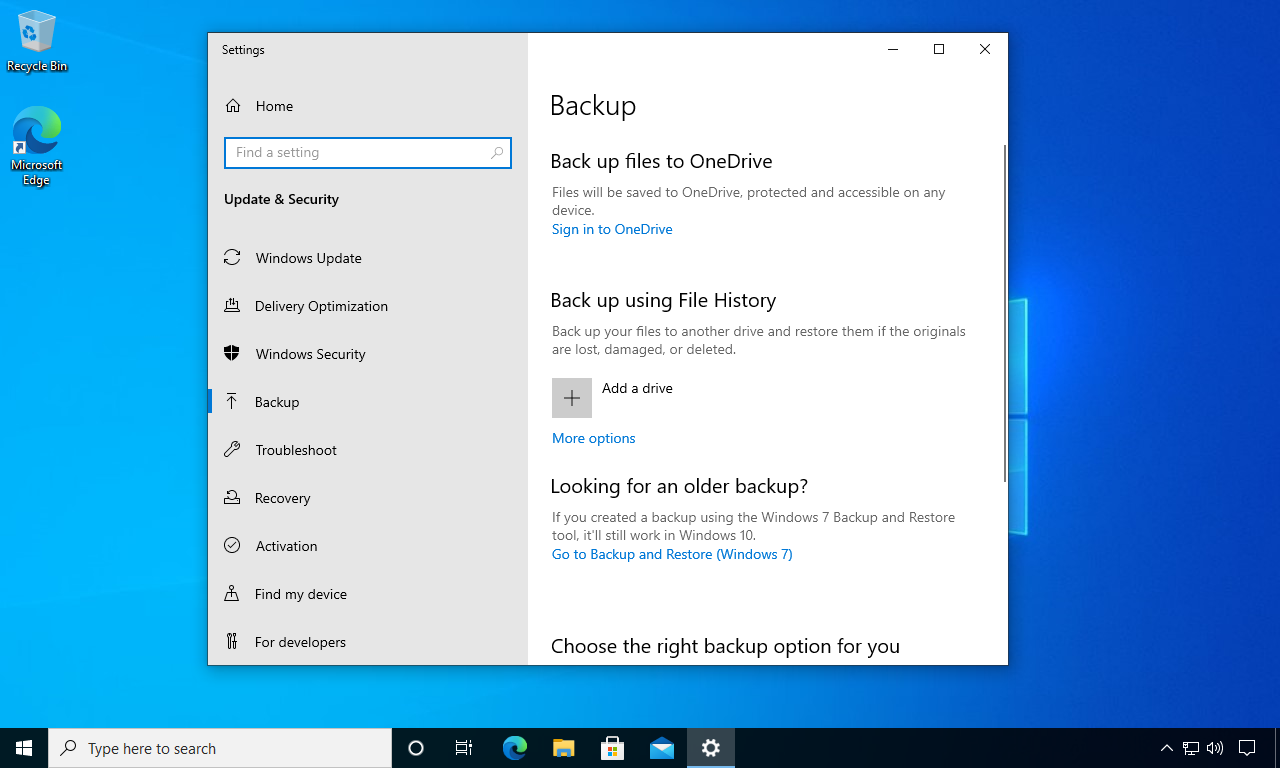
From the Backup page, you can click “Add a drive” and select your external hard drive from the list.
Once your external hard drive is added to File History you are able to click “More Options” to select what you would like to have backed up and other settings:
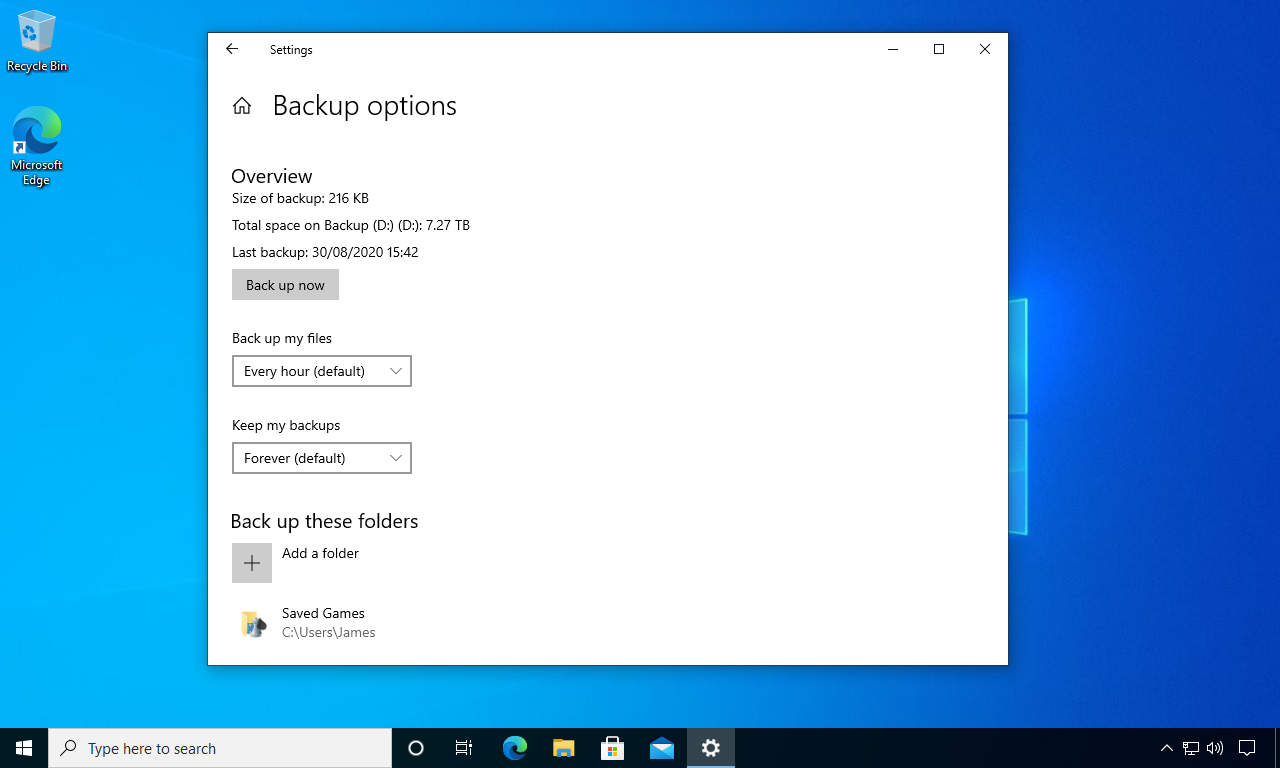
By default, File History will back up most of the folders in your User Profile folder and any other folders within those folders. You can add additional folders you would like File History to back up by clicking “Add a folder” at the top of the list.
At the top of this More Options page you are also able to see the status of your backup in the Overview section. From here you will be able to see when the last backup was made, if it’s currently backing up your files, which drive is being used and how much space on your backup drive is being used for backup data. This can be important if you ever want to check that your backups are definitely backing up. You can also tell it to do a manual backup from this section if it isn’t already creating one.
The “Back up my files” and “Keep my backups” options are important. The defaults are normally fine for most people, but it’s worth understanding what they do.
The “Back up my files” setting determines how often File History should check for changes in your files and back them up. This means that it will wait for a maximum of an hour before creating a new revision of each file you’re working on. If you’re often working on very big files that are saved very often it may be worth extending this to a longer period of time to avoid a lot of older revisions of those files taking up too much space on your backup drive.
The “Keep my backups” setting determines how long older versions of your files should be kept. You will always have a backup of the latest version of each file available. The default setting, “Forever” means that it will continue to store older copies of your files forever until the backup drive becomes full. If you select “Until space is needed” it will keep older versions of your files until the drive becomes full and then it will remove the oldest revisions of files when space is needed on the backup drive. This is a sensible option that offers the best balance of old revisions vs making the most of your available space on your backup drive. If you’re only using your external hard drive as a File History drive, a full automatic backup drive is a happy drive! Make the most of the available space, you have paid for it after all.
The other options for how long to keep your backups are durations of time, so for example if you select “1 month”, File History will keep the latest copy of your file and older versions of that file up to a month ago and remove anything older than one month. These are good options if you won’t need older copies of your files or any files you’ve deleted by accident that are older than these durations of time. This is a sensible option if you use your external hard drive to store other data as it prevents the drive from getting too full too quickly. It can also be a good choice for data protection if you’re storing data under the GDPR to prevent you from storing personal information from other people for longer than required.
Note: If File History ever runs into any issues it will normally tell you about it by displaying a pop-up alert. These alerts might be for issues such as a full backup drive that can’t make more space, a backup drive that’s not been plugged in for a long time, or any other issues that might stop File History from working. Although these alerts are good, it’s always worth checking from time to time that backups are still being created from the File History settings page, just to be on the safe side.
Best practises for making sure your drive stays healthy
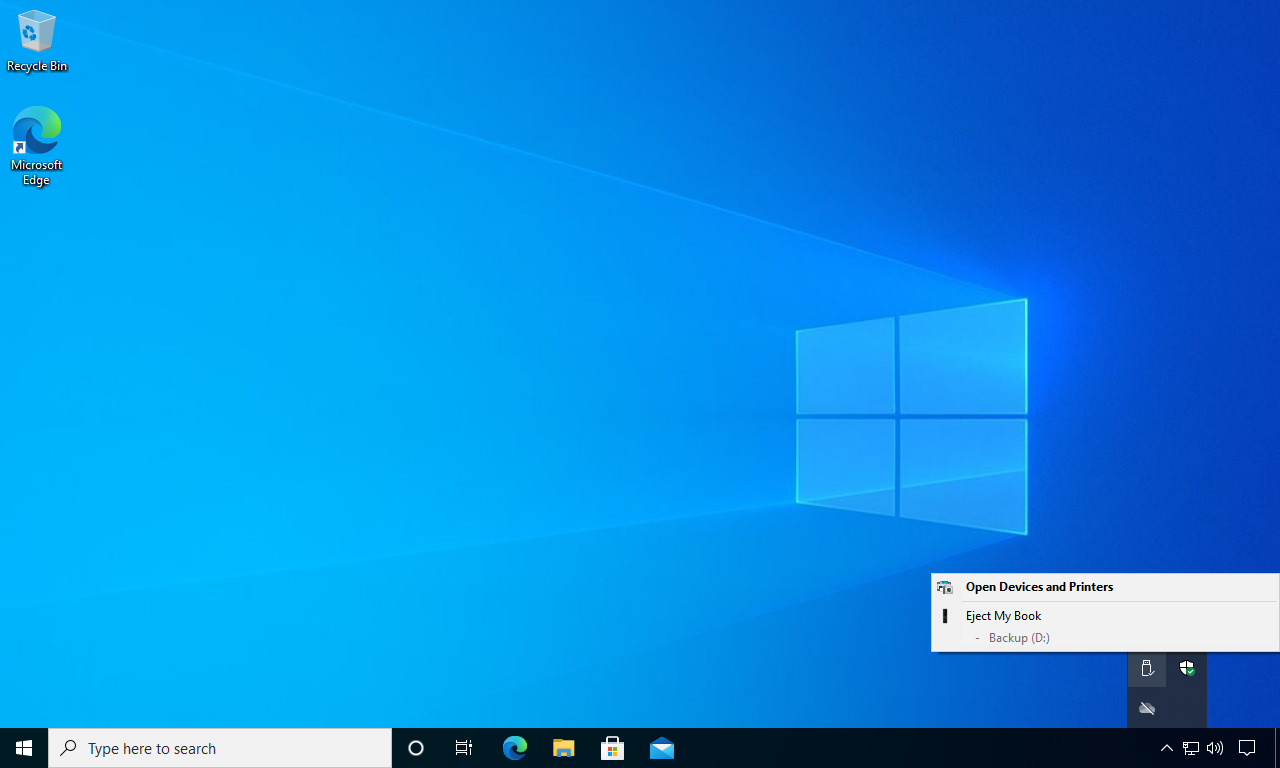
Be sure to safely remove your external hard drive or only unplug it when your PC is turned off. You can safely remove your drive by right-clicking on the “Safely Remove hardware and Eject Media” icon from within the task bar’s notification icons and selecting your external hard drive to eject it. This prevents the data on your hard drive from becoming corrupted if it’s interrupted mid-way through using the drive. Be sure to wait for the “Safe To Remove Hardware” message before physically unplugging it!
An other important note is if you become victim of a ransomware attack, your backup drive and any other attached storage devices are still at risk of having the data on them damaged. It’s a good idea not to leave the backup drive plugged into the PC all of the time, and to also create an other backup drive or store a second backup on a different off-site backup medium such as cloud storage.
Very clearly set out. Thank you.
Excellent advice, James.
Many thanks again for your first class service in double quick time on my venerable Yoga this week. It feels slick again.
Will recommend you without hesitation.